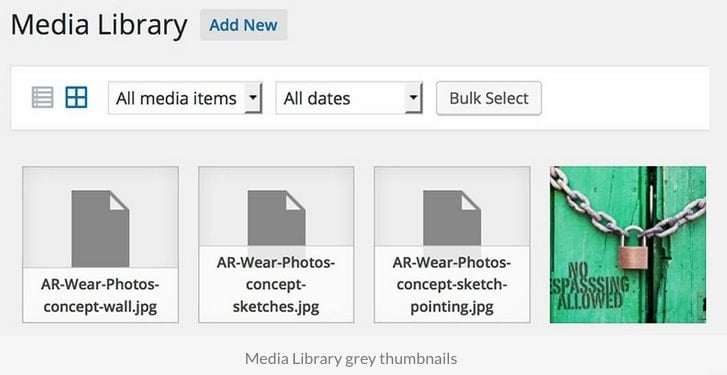
Over the last few months, we’ve received a number of requests for assistance on a WordPress Media Library-related issue. Specifically, WordPress users were reporting that their Media Library image files weren’t showing up as proper thumbnails – it seemed as if the thumbnails were missing. Instead, they were getting only greyed-out and blank document icons in the Media Library, like so:
Common Causes for Blank Thumbnails in the WordPress Media Library #
- Issues with Plugins – Third-party plugins are often the cause of many issues in WordPress. This particular issue can occur when you install a new plugin or update ones you already own.
- Issues with Themes – While less likely, new themes and theme updates can sometimes lead to errors on the back and front ends of your site. This is especially true if your new theme uses a different thumbnail size.
- Thumbnail Sizes Changed – Piggybacking off of the previous cause, blank thumbnails can occur when you change your default thumbnail size and your older images do not switch over to the new size.
- Conflicting File Names – Usually, when you upload a new image with an identical file name as an old image, WordPress will add a number to the new image to differentiate it from the old one. While rare, uploading images with the same file names as older images can sometimes lead to issues, including blank thumbnails.
- You Moved from HTTP to HTTPS – Media URLs don’t always follow suit, and issues with broken images on the frontend and blank thumbnails on the back can occur.
9 Ways to Fix Blank Thumbnails in WordPress #
Fix #1: Make sure your WordPress site is up to date #
Sometimes, fixing this issue is as simple as bringing your WordPress site, themes and plugins up to date. Go to Dashboard → Updates to see all of the updates that need to be installed. You can also go to the Plugins and Themes pages.

Back up your WordPress site, then update to the latest version of WordPress.
Update your theme and plugins one by one. Refresh the media library after each update to see if the issue persists or if new issues arise.
Alternatively, see if your host offers a staging area you can use to test updates without affecting the live version of your site.
Fix #2: Deactivate all plugins #
Go to Plugins → Installed Plugins, and use the checkbox at the top of the list to select all of your plugins in one click.
Then, select the Deactivate option from the Bulk Actions list. Click Apply.

This deactivates all of the plugins installed on your site and will help you pinpoint whether or not a plugin is causing blank thumbnails on your site.
Refresh the media library, and see if the blank thumbnails reappear. If they don’t, reactivate your plugins and move on to Fix #3.
If they do, reactivate each plugin one by one. Refresh the media library after each reactivation to see which plugin causes the issue.
Your options from this point are simple: delete the plugin or fix the issue. If you don’t need the plugin’s functionality at all, delete it. If you do, see if an alternative exists.
If you want to keep the plugin, reach out to its support staff on WordPress.org if it’s free or its support center if it’s premium.
Don’t forget to reactivate all of your other plugins.
Fix #3: Activate a default theme #
This method requires a default WordPress theme to be installed on your site. These are free themes that come with every new WordPress installation and are typically named after years, such as “Twenty Twenty-One,” “Twenty Seventeen,” etc.
It’s a good idea to keep at least two of the latest default themes installed on your site as WordPress will activate the most recent one when you deactivate your current theme. You can install them by going to Appearance → Themes → Add New.
Once you’re sure you have a default theme installed, deactivate your current theme by activating a default theme.

Refresh the media library to see if your thumbnails are still blank. If they are, reactivate your primary theme, and move on to the next fix.
If they aren’t, try the next fix anyway, then reactive your primary theme to see if it repaired the issue. Sometimes, regenerating thumbnails can fix thumbnail issues caused by themes.
If Fix #4 doesn’t repair the issue for your primary theme, consult your theme developer’s support center for assistance.
Fix #4: Regenerate thumbnails with a plugin #
If the above solutions did not work or you recently changed themes and believe your thumbnail sizes have not resized, use a plugin to regenerate your thumbnails in a few simple clicks.
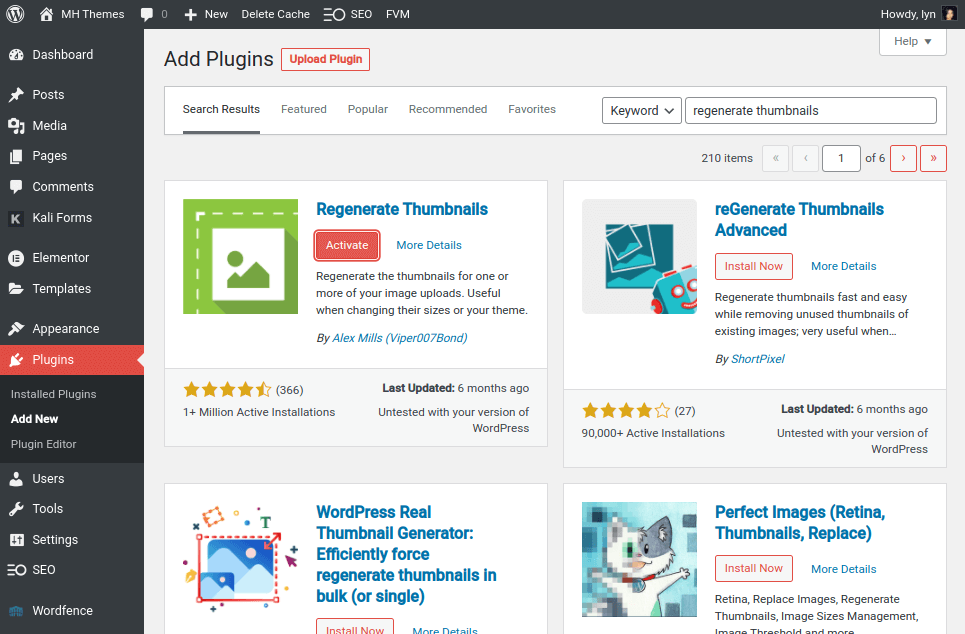
The most popular plugin for this purpose is aptly named Regenerate Thumbnails. It’s free, so you can install it directly from the Add New plugin page in WordPress.
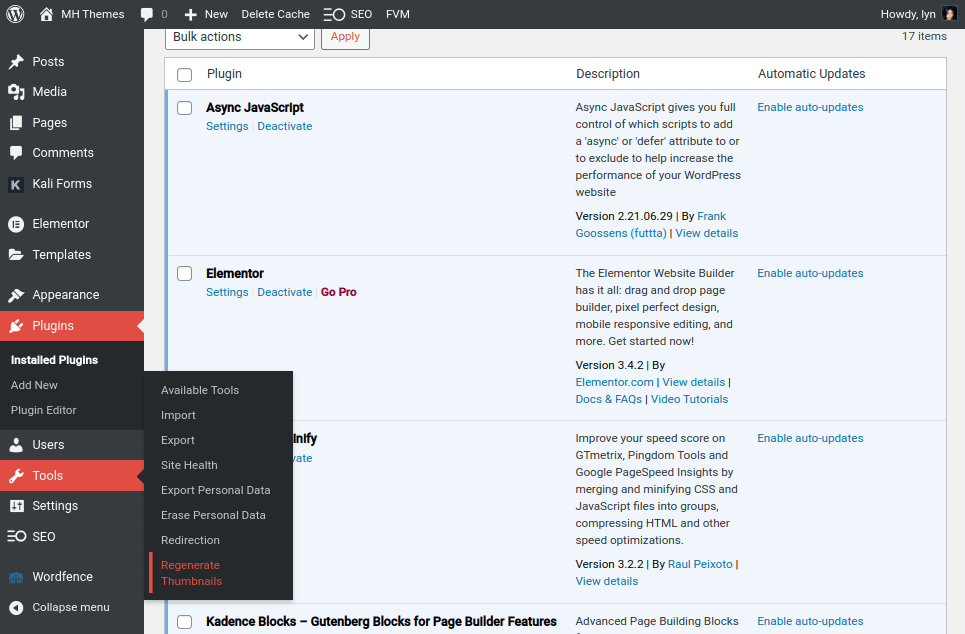
You’ll find this plugin’s dashboard under the Tools menu in the admin menu.
If you know for a fact you’re only having trouble with a few thumbnails, feel free to leave the “Skip regenerating existing correctly sized thumbnails” option checked. Uncheck it if you want the plugin to regenerate all of your thumbnails just to be sure. Just know that this will eat up more time and resources.
Leave the “Delete thumbnail files for old unregistered sizes” option unchecked. While it will free up server space, it may lead to broken images across your site.
Click the Regenerate Thumbnails for All x Attachments button when you’re ready, and wait for the tool to regenerate thumbnails for all of your attachments.

Fix #5: Reupload images with different names #
If you suspect your images with blank thumbnails share file names with older images in your media library, delete the newer images, give them unique names, and reupload them.
Again, WordPress should recognize these as two different images, but errors may occur from time to time.
Luckily, this one’s a quick fix, and you can always move on to Fix #6 if you’re still experiencing issues.
Fix #6: Check folder permissions #
Your site’s files and folders have different permission parameters you can set to determine who is allowed to read, write and execute them. They’re important in the stability and security of your site.
This means if they’re not set correctly, hackers may be able to access your files and certain errors may occur across your site, including blank thumbnails on the backend.
Fortunately, it’s an easy fix once you learn how to get into your site’s file system.
First, go to Settings → Media on the backend of WordPress, and make sure the “Organize my uploads…” setting is enabled.
Next, change your folder permissions to optimize them for WordPress. This is easy if your host uses cPanel or has its own file management tool. The tool should be named File Manager either way.
If your host doesn’t have a file manager, install an FTP client like FileZilla on your computer. It has a Quickconnect feature in the panel at the top of the application. Read your host’s documentation or contact them directly in search of the following information to connect to your site’s file system through FileZilla:
- Host IP Address (sometimes using your domain here works)
- FTP Username
- FTP Password
- Port
FileZilla is a popular FTP client, so your host may have instructions specifically for the application.
Once you’re in your site’s file system, open the root folder (typically named public_html). Then, open the wp-content folder.
Find the Uploads folder (right-click on it or highlight it, then click the Permissions button), and make sure its permissions are set to 755 or 775 (but never 777 as this creates a major security risk), though make a note of its original value. Sometimes, changing permissions creates other problems on your site that are only solved when you restore permissions to their original values.

Refresh your file system from the file manager, then check the media library again to see if your thumbnails restored.
Fix #7: Force image URLs to use HTTPS #
Did you recently install an SSL certificate on an existing website? You should have changed your site URL setting so that it uses https:// instead of http://.
Unfortunately, some URLs, including image URLs, don’t convert to HTTPS. This can cause 404 errors, broken images and yes, blank thumbnails.
Be sure to back up your site before you attempt this fix.
Install a plugin called Better Search Replace. Next, go to Tools → Better Search Replace.

Enter “http” in the Search for box and “https” in the Replace with box, then click Run Search/Replace.
Fix #8: Change your PHP version #
Some users have fixed this issue by changing their PHP versions, then changing them back. Some hosts allow you to change your PHP version yourself. Others require you to contact them to have them do it for you.
Either way, upgrade or downgrade your PHP version, then change it back to its original version to see if this restores your thumbnails.
In most cases, you should use the highest version of PHP your host offers. Use a staging area or maintenance mode to test the upgrade to ensure your theme and plugins are compatible with the PHP version you choose.
Fix #9: Restore your site to a recent backup #
If all else fails, you can restore your site to a recent backup before the issue first took place. This is a last resort as it’ll undo any additional changes you’ve made to your site since that backup, including plugin updates, new content and style changes.
If you don’t use a backup solution yourself, check with your host. Most reputable hosts offer daily backups and keep seven to 30 days worth of backups on hand.
These hosts usually offer a restore tool as well, allowing you to restore your site to a recent backup in just one click.
Consult your host’s help docs or contact their support team if you need help.