Using caching on your website is possibly the most effective way to decrease loading times of your web pages and bring content to your visitors quickly. WordPress has an abundance of cache plugins freely available to help you increase performance throughout all aspects of your WordPress website.

The more complex these caching solutions become, the more cache issues people can stumble across. In this article, we’ll take a look at what caching options are available to you. We’ll also walk you through solutions that will help you overcome cache issues you might have on your website. Let’s first take a look at some of the most popular caching plugins for your WordPress website.
- Popular Caching Plugins
- Enabling Caching in wp-config.php
- Clearing your Plugin Cache
- Find Cached Files on your Server
- Clearing Browser Cache
- Caching Issues while Developing / Coding
- Disabling Plugins when Facing Issues
- Regenerating Thumbnails
Popular Caching Plugins #
There are many caching plugins available to you for free within the official WordPress Plugin Directory. Two of the most popular WordPress caching plugins, WP Super Cache and W3 Total Cache both have several million active installations between them. They offer a comprehensive caching solution for use on your WordPress site which can decrease loading times out of the box.
W3 Total Cache offers a huge suite of caching features, most of which are only available to premium users. Yet, the free version of this plugin still offers you the ability to cache many aspects of your site.

WP Super Cache offers a more welcoming interface and a variety of easy to understand caching options that are targeted towards ease-of-use and performance.

Furthermore, the premium plugin WP Rocket is a really good caching solution for WordPress too. WP Rocket offers tons of options when it comes to speeding up your WordPress site. It includes multiple forms of caching, mobile caching, cache preloading, GZIP compression, lazy loading, database and Google fonts optimization and much more. We also wrote a detailed review for WP Rocket and compared it to W3 Total Cache and WP Super Cache in our blog series:
- WP Rocket Review: We Tested One of the Most Popular Premium Caching Plugins for WordPress
- WP Rocket Tutorial: How to Speed Up Your WordPress Site with WP Rocket
- Comparing WP Rocket Against Top WordPress Caching Plugins
Which cache plugin you opt in for is up to you. You can test the free ones for a certain period of time and see if they suit your needs and are convenient for you to handle. Make sure the cache plugins you are using are well-rated, compatible with the latest WordPress version and fairly supported.
Enabling Caching in wp-config.php #
Another caching mechanism you could take advantage of is the default WordPress object cache. You can enable or disable the native WordPress object cache using your wp-config.php file, like so.
define('WP_CACHE', true);
Simply add the above code directly above
1 | /* That's all, stop editing! Happy blogging. */ |
using any text editor (Notepad is fine) and save the file. This caching method is also referenced within the WordPress Codex under: Editing wp-config.php.
Clearing Your Plugin Cache #
Not being able to view recent post or page changes or being unable to view changes made using the customizer, are some of the most common cache issues users can experience when making use of a cache plugin. Most cache issues can be solved by clearing the cache. That can usually be done via the provided options page of the cache plugin you’re currently using on your WordPress website.
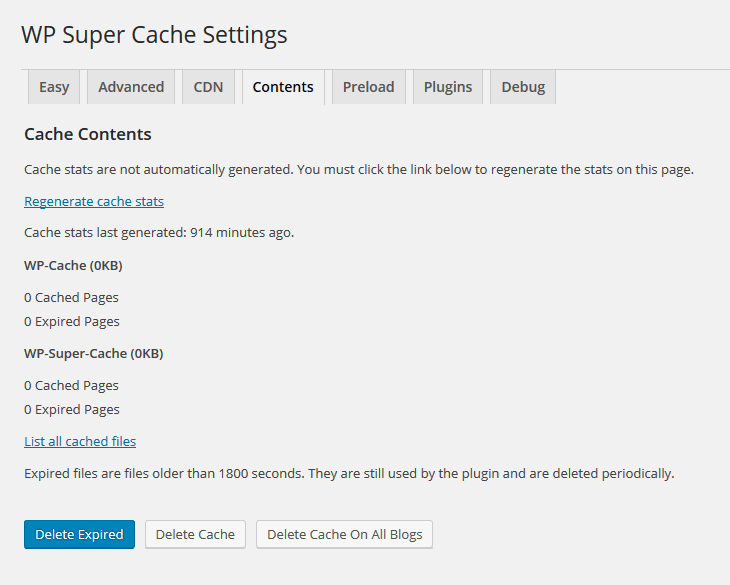
For example, when we take a look at the WP Super Cache plugin, you can very quickly clear the entire cache. Simply navigate to the plugin’s options page via Settings => WP Super Cache => Contents in your WordPress dashboard and click the Delete Cache button.
Find Cached Files on Your Server #
You can use your preferred FTP Client to locate the cached files on your server. Typically these files are stored within a folder titled cache. This folder is located within the wp-content folder of your WordPress installation, like so (or slightly different based on your setup):
/public_html/wp-content/cache
Clearing Browser Cache #
When it comes to cache issues on your website, browsers can also play a part. Each browser has its own independent cache as well. This helps serving website pages to you in as little time as possible. Clearing this cache is still a simple process however, you just have to be sure you’re clearing the correct elements of the cache. To have full control over what elements you’re deleting you can follow one of the browser-specific solutions below.

Firefox Caching #
Users of the Firefox browser can empty their cache via the Options => Privacy menu. Simply click the Settings button under the History heading. You can then choose which elements of your browser cache to delete. Alternatively, you can install a Firefox add-on called Empty Cache Button. This will add a handy button at the top of the browser that allows for 1-click cache emptying.
Chrome Caching #
If you’re a Chrome browser user then you can clear your browser cache via the Settings => History => Clear Browsing Data menu option. This will bring up a dialog box allowing you to select which data you would like to clear. Alternatively, you can install the Clear Cache extension for Chrome. It places a handy button at the top of your browser that allows for 1-click cache clearance.
Edge & Safari Caching #
Users of the Edge browser can clear their cache via the Settings => Choose What to Clear option. Simply check the elements you would like to clear and click the Clear button. When using Safari, users can clear their browser cache via the Reset Safari menu option. This will open a dialog box that allows you to select various elements that you would like to clear. The Clear History will empty the browser cache, as well as removing your website history list.
Caching Issues While Developing / Coding #
Most of the popular caching plugins will automatically clear your cache when you publish a new Post or a Page on your WordPress website (if the plugin is configured accordingly). That allows visitors to view the very latest version of your website when there is something new to read. Yet, if you’re modifying theme code or making design changes on a live site whilst a cache is active, it’s different.
You very likely won’t be able to see your changes until you clear the cache of your plugin or browser using one of the methods described within this article. This is when a browser extension becomes a handy tool for web developers to make use of 1-click browser cache clearance can be a time-saver.
Disabling Plugins When Facing Issues #
A likely solution to most plugin-related issues is to deactivate all currently active plugins. This also applies to caching plugin issues. You can do so via the Plugins menu in your WordPress dashbaord. Simply tick the checkbox of each plugin you wish to disable and select Deactivate from the drop down menu at the top of the page in your dashboard.
When dealing with lots of plugins on your WordPress website, it may happen as well that you’re facing unexpected issues. This usually can happen especially after plugin updates which may lead to scenarios like broken layouts, unresponsive websites or even:
I’m locked out of my admin dashboard!
When you’re locked out of your website, you obviously can’t disable plugins through your WordPress dashboard anymore. Luckily you can also deactivate all plugins by renaming your plugins folder. You can do this either by using your preferred FTP Client, such as FileZilla, or by using your hosts File Manager service. The plugins folder usually can be located at:
/public_html/wp-content/plugins
Temporarily rename the plugins folder to plugins-old and try logging in to your WordPress dashboard again. Once logged in, you can rename the plugins-old folder back to plugins. You can now activate each plugin one-by-one in an attempt to find the problematic plugin that is causing your issues.
Regenerating Thumbnails #
Although not directly related to cache issues, if you are changing themes or modifying image sizes, your Image Attachments may not be displayed correctly. This might be because you are seeing an old version of an image that has previously been cropped to the dimensions set by your prior theme.

Upon activating a new WordPress theme, the theme declares specific dimensions for your images to use. So unless you regenerate your images, your theme may by displaying images with undesirable effects, like squashing or stretching. Sometimes when using sliders, the images may oddly resize. You can solve this by ensuring that your new theme is using correctly sized thumbnails.
Simply install a plugin that allows you to regenerate your thumbnails. The plugin will go through your image attachments and regenerate each image in accordance with the dimensions set by the theme you’re currently using. If you have a lot of images this process may take several minutes, so be patient and wait for the plugin to inform you that your images have been successfully regenerated.